Tuesday, August 18, 2009

Turon - Sweet. Crunchy. Goodness.


We have an annual block party around this time of year. We have 10 different nationalities represented just on our little cul-de-sac and the variety of food is just amazing. I struggle to think of what to bring that's not your typical Filipino dish like pancit, lumpia, or chicken adobo. Since most people bring savory dishes, I thought I'd go the dessert route this year.

Turon has got to be one of my all-time favorite Filipino desserts. It's basically a banana egg roll. The banana used is a saba/plantain banana so it's a bit more firm and mild. Some people put jackfruit (langka) and coconut. But I like to stick to jackfruit since it complements the texture of the banana. The flavor is... hmm, how would I describe it...

Crunchy and sweet at first bite because of the lumpia wrapper and caramelized sugar
then...
Tender and mildly sweet on the inside because of the saba banana
then...
Fruity and almost sweet perfume-like when you bite into the jackfruit

I had to research how to to make this. I didn't quite know the technique when it came to caramelizing the outer wrapper. So I found the most common method of rolling it in brown sugar then frying and stuck to it.

So here it is...

Ingredients:
5 Saba Banana (I bought it at Seafood City but it can be found in Mexican produce stands as well)
1 can of Jackfruit (can be found in any Asian market)
20-25 pack of Egg Roll or Lumpia Wrappers (I go for the extra route just in case they tear)
Golden Brown Sugar
1 Egg, beaten
Vegetable oil for deep frying (a light-flavored oil works best)

You can use a "regular" banana but I'd stick to a more firm one since it would get mushy when you fry it.


Separate the egg roll wrappers (this was my job as a kid when cooking with dad). Keep the wrappers covered with a damp towel to keep it from drying out. Peel and quarter the banana lengthwise. You may have to use a knife to help you peel the banana. Slice the jackfruit across the grain.


Lay 1 piece of banana, 2 pieces of jackfruit at the corner end of the wrapper. Top with about 1-1/2 tsp of brown sugar.


Roll it by pulling the corner over your ingredients, then the top and bottom corners and then rolling towards the other end. Seal the end with a light coat of the beaten egg.


Make a whole bunch of them and keep them covered with a damp towel until your ready to fry them. Right before frying, slightly wet the uncooked turon and roll it in brown sugar.


Deep fry in 350°F oil. I know it's tempting to get a lot done at once, but don't over-crowd the fryer/pan. You'll bring the cooking temperature down and end up with soggy turon (ick!).


Drain on a cooling rack. Do not drain on a paper towel because the sugar on the outside of the wrapper will make it stick.


Allow to cool enough to not burn your mouth and enjoy!!

I'm sure there's a better technique for making it more sticky and caramelized on the outside. It seemed that a lot of the sugar fell to the bottom of the fryer and didn't stick to the wrapper. But it still added to the flavor and texture. If you look at the picture above, there's only 19. I tried one of them without the sugar on the outside and it was acceptable, but did not have the sweetness texture I wanted.

It was good... not as good as the street vendors on the Philippines or from Tita's Kitchenette. But the neighbors seemed to enjoy it.

Friday, August 7, 2009

What's in a Box?


So many things!!

I'm jumping the gun with this post as this project is for a future gift for someone. But I couldn't wait. Since my life has been quite hectic I would probably forget to take photos and give the gift away without one last memory except for the scraps that came out of it.

I apologize for the grainy/fuzzy pics. I was losing natural light and my ISO was a wee bit high.

So on with the show…


Sushi anyone?


How about some noodles with beef?


Perhaps a snack of sugar snap peas, gyoza, strawberries or a cookie would be your speed?


Felt food is so much fun. I started making felt food when I was pregnant with Solana - I wanted to make cookies to go with Mya's tea set and surprise her with them as a gift after Solana's birth. Then I started doing felt food searches on Etsy and boy, did my head get filled with ideas!

So why Japanese food? First off, I like eating it (real food, not felt). But really...when Mya started eating lunch at school I went to Daiso and picked up a bento box ($1.69 - can't beat that!) so that she didn't have to deal with bulky tupperware in her lunchbox. Me being me and having to research everything, I looked up what usually goes in a bento box and found Lunch in a Box and was intrigued. I didn't realize that bento boxes are usually stuffed. Well, I would never stuff Mya's bento that much - she probably couldn't eat all of it (unless it was full of egg-salad sandwich). So I figured that the next best thing to making a full bento is to do it with felt food.

All the food was hand-sewn (no glue). I didn't even use a sewing machine. It probably would be hard to use with such intricate work. I mostly did a blanket stitch around the seams with the exception of the strawberries. The noodles were the easiest thing - they're just 1/4 inch strips of felt.

This is a dual-purpose gift - you can play with the felt food or set it aside and fill up the bento with real food. It's great for trips to the zoo, amusement park, or anywhere where you wouldn't want to buy expensive amusement park food. I'd probably fill mine with what the Filipinos call baon (pronounced Bah-ohn) which is usually rice with some kind of mixed vegetables and meat in a sauce. Then on the bottom (smaller portion) I'd put some cookies, crackers or cut veggies.

So here it is all together... in a bento:


I'm working on more food—A cake as a matter of fact. It's quite cathartic sewing this all by hand. It's like sewing the binding on a quilt... except this travels better. I can sew these little things while having tea or coffee with my friends.

Tuesday, July 14, 2009

Cupcake Party Plans

I am planning TWO birthday parties this year!! My baby's going to be one in October and Mya will be five. Mya had picked out a cupcake theme for her sister and has already planned her own party (ya think she takes after me?). Since we are going to be rather busy in the coming months I had to start planning early.

I'm a fan of making inspiration boards. I'm also a fan of fabric. Lately my inspiration has come from fabrics. In the center is a Robert Kaufman fabric—I believe it's called Cupcakes from the Confection series with a coordinating Jimmies Sprinkle fabric. Hovering below the fabrics are colors I intend to use for the party. I'm just itchin' to get my hands on that fabric. I already have an idea of what to do with it after the party.


The party images on the top right are from a "Cupcake Par-tea." Invitations are from Williams-Sonoma but I plan to make my own, possibly using the Jimmies sprinkles. What would a cupcake party be without inspiration from Hello Naomi and Bakerella?!? The cupcakes are so adorable and the cupcake pops are a great idea for party favors. I've also included some cupcake-inspired images from a few Etsy stores. I'm not a tu-tu kind of gal but I think little Solana would be adorable in it.

This theme is rather girly of me but it's fun to step out of my comfort zone. I'm not quite sure how this will translate into a 1-year-old birthday party just yet. I'll have to write up a guest list and see what the age range is so that everyone will enjoy it.

On another note... my project status
I haven't quite yet gotten to all the projects that I've been intending to do. Work has me swamped as well as volunteer and social commitments. Not to mention my family needs attention, too! So I have been doing things on an on-demand basis, like making nursing covers (aka "hooter hiders") and crayon rolls for gifts. I have some fabric that's been cut and ready to sew, I have dresses and skirts that are ready to be hemmed and taken in (if you knew how short I am, "normal-length" dresses look ridiculous on me)—My sewing machine is beckoning me.

I hope everyone's enjoying their July!

Monday, April 6, 2009

Sweet Bird's Nests


It's almost Easter! Time for sweet treats. I'm bringing these bird's nests to Mya's class for her "Easter party #1." They're super simple to make. Mya even helped me with them.


Ingredients:
Chow Mein Noodles (the cracker-like stuff - not real chow mein)
Butterscotch Morsels
Cadbury Mini Eggs (yes, we got into our bag before making this)


Step 1: Melt the butterscotch morsels. I use the double boiler method since I don't get good results with my microwave oven. But if you're comfortable with your microwave oven, by all means, go for it.

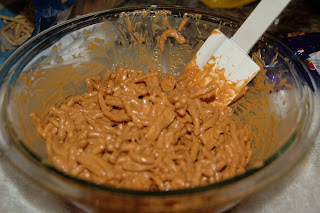
Step 2: Add chow mein noodles. We added about half a package (or 8 oz.) of noodles.

Step 3: Mix. It's more like folding. You don't want to break up the noodles too much.

Step 4: Make nests. Line a baking sheet with wax or parchment paper. Using a tablespoon, scoop the noodles into little piles on the lined sheet. Using your fingers, manipulate the noodles so that they become nest-like.

Step 5: Add eggs. Add the candy eggs while the butterscotch is still melted and they will stick to the nest when it's cooled.

Step 6: Allow to cool and harden. You can either leave them out or do what I did and stick them in the fridge.

And that's it!! Easy peasy. I've got more to make this week–Treats for both kids and adults.

Ortwine's - Going back in time

When I first got my driver's license up until her passing, I used to take my grandma to Ortwine's (or as she would say, "Ornshwines") to get craft supplies and yarn. Ortwine's is a hardware/general/craft supply/sewing supply store that's been around since the 60's or 70's. It's located in an older neighborhood of South East San Diego. My friend, Phuong, found the store a few weeks ago and I was surprised that it was still open. I decided to take a trip there on Saturday, lugging along my two girls. I really wanted to show Mya where "mommy used to go when she was a little girl."

Once we stepped in, it was just as I remembered it - hardware and some general items to the left, craft items to the right and in the back, fabric, yarn, trims and notions. The aisles were tighter than I remember (maybe it was because I was smaller back then) and it was still disorganized and dusty. The best part... they don't update their inventory unless there's a need to. So the store was stuck somewhere between the early 70's and mid-80's and so were their prices. I think their inventory of fabric trims and zippers is a lot larger than Joann's (although it a much smaller space).

I took a few photos of the craft and sewing items with my camera phone:

Their yarn inventory - this is what I remember the most since my grandma loved to crochet.


Rotary phone in the back.

Zippers galore!! They also had 50 cent zippers up front.


Every color and size of bias tape that you can think of!

Their trims, trims and trims! (Sorry for the fuzzy photo)

Stacks of vintage fabric - lots of cotton. Notice the pipes and hardware in the background.

These creepy doll-making faces. Yikes!


There were lots of other interesting things, like paper napkins and tablecloths from the 70's, serving and warming pieces from the early 80's, pea shooters from who knows when, and lots of general hardware supplies. It's worth checking out if you like that kind of stuff.

Ortwine's Hardware & Appliance:
4715 Federal Blvd
San Diego, CA 92102

Friday, April 3, 2009

Back from a hiatus - Brayden's Quilt


Yes, I know it's been months since I've last posted something. But I promise you that more things are coming!! I've been on hiatus since having the baby, the holidays, then a crazy hectic schedule with some church events and work. But I promised myself that I'd find time to work on a project during my down time.

I had little bits of down time last week and have been intermittently working of this quilt. This quilt has a story...

My good friend, Mary, was having a baby boy and I had offered to help plan her shower along with her friend. Needing inspiration, I looked towards fabric and found this super cute Michael Miller fabric called "Silhouette Boys." It had coordinating fabric and everything! So I started pulling together some ideas and came up with the inspiration board below:


So the party ended up revolving around the blue and brown color and this "Boy" fabric. I even made invitations to match (A brown ribbon was tied to the top):


I bought the blue boy fabric and the brown fabric with the blue dots to use as decoration for the party. I turned them into table runners and wrapped some cylindrical flower vases with the fabric. Unfortunately, I was so busy at the party that I forgot to take pics!!

I had the intent of using the fabric to make a quilt... and I actually did - in record time!! This came out to approximately 36" x 46" - a good crib quilt size. I had the blue "boy silhouette" fabric, the dots and even the white fabric was the tablecloth at the party. I went to my friend, Pam, again to dig through her stash and found a black fabric with gold printing for my border. I was afraid that it wouldn't really match up since the silhouettes were a very dark brown but I think it worked out quite well.

I machine-quilted this bad-boy with my 301. It was the first time I tried stippling (thanks to Crazy Mom Quilts for giving me courage to try it). Some areas were looser than others but overall it turned out okay.


My favorite part is the back. I messed up my measurements, cutting 2.5" strips instead of 1.5". So I had a whole bunch of 1" strips laying around after fixing my mistake. I pieced those strips together to make the band on the bottom half. I pieced the rest of the leftover fabric and I nearly used up all my fabric! I love it when it works out that way. The quilting really stands out on the black fabric - you can see my stippling and crosshatching on the squares. Oh, and of course, I had to label my quilt. I finally bought muslin and freezer paper - now I have to label Mya's quilt, too.


Well, this was quilt #3 for me. I'm getting the hang of it. I still have to work on pinning my "quilt sandwich." I had a few areas that were bunched up and was real frustrated with myself. One day, I'll have a totally flat quilt... one day.

Oh, I have to add... Brayden was born this past Monday, March 30th. The quilt was finished on the 29th. Good timing, eh?

Next up on my project list:

  • Easter's coming!! It's one of my favorite times of the year since I can make Spring treats!

  • I went to an awesome garage sale and bought a Bernina serger for $50!! I'll show you an easy grocery bag using one piece of fabric (no serger needed for it, but having it is nice).

  • Mya needs jeans. Pam recommended a good pattern and I'm going to face my fear of making pants (story on that to come).